
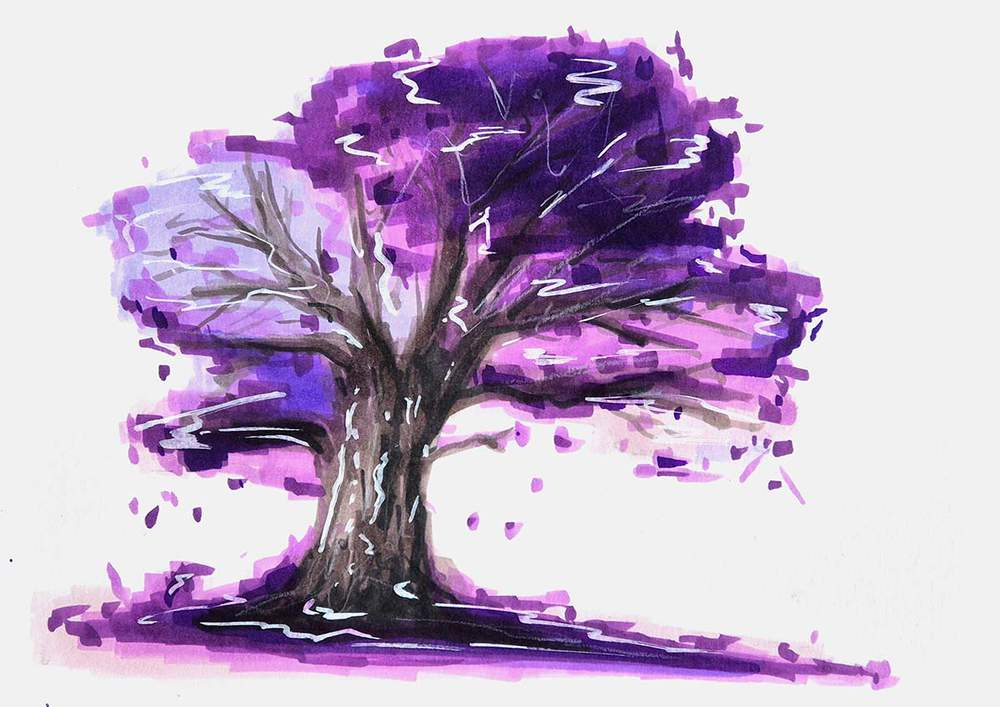
I came across this picture of a purple tree while browsing Pinterest. I knew I had to try that drawing as soon as I saw it.
I’ll walk you through the entire drawing process and the tools I used in this lesson so you can create this enchanted purple tree as well.
It’s simple to use and ideal for novices or anyone seeking drawing inspiration.
Let’s begin!
Disclaimer: For complete openness, please be advised that this blog post includes affiliate links. If you make a purchase via one of these links, I will receive a tiny compensation (at no additional cost to you).
Materials I Used for Drawing
I used Ohuhu Honolulu markers in the following colors to create this magical tree drawing: Pansy (R17), Clematis (R13), Lavender (P4), Pastel Violet (P3), Grayish Cherry (R242), Viola (V230), Pale Lilac (V020), Red Grey 05 (RG050), Red Grey 08 (RG080), and Neutral Grey 6 (NG06).
On their website, you can also purchase each of these hues separately.
I added white highlights with a white Posca PC-3M paint pen.
I also used the Derwent Chromaflow colored pencil in white.
I also used a standard HB pencil and an eraser.
Additionally, I used Canson Illustration Manga Paper to create this drawing.
How Can a Magical Tree Be Drawn?
How to Draw a Lowrider in 14 Clear Steps – Realistic & Easy Step by Step Guide : Click here
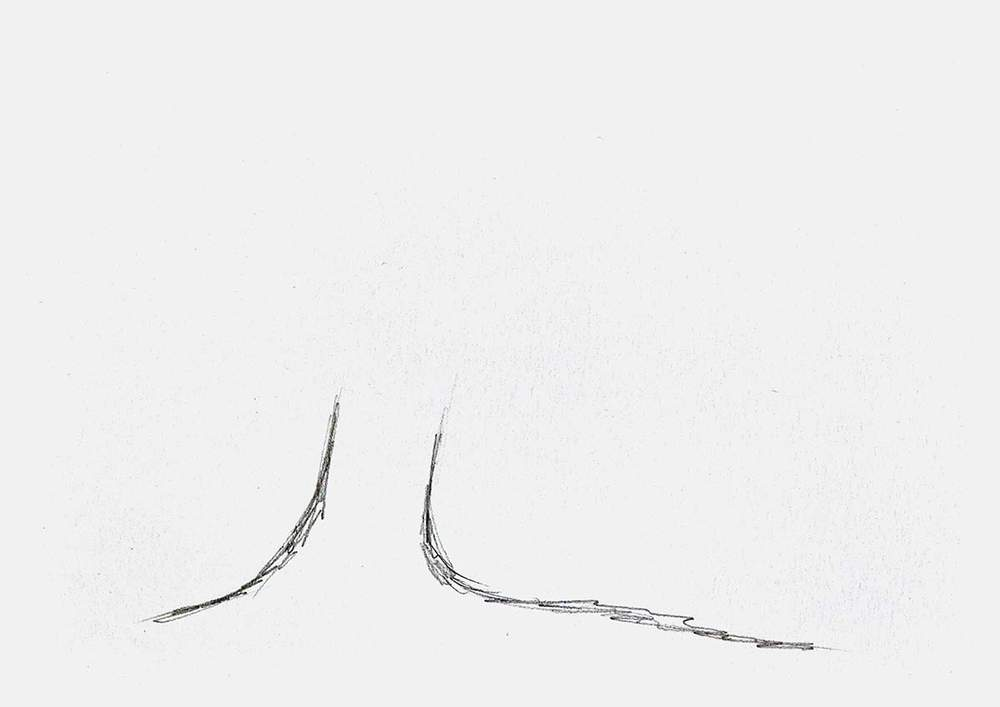
Step 1: Draw the Magical Tree’s Trunk Base
If a tree is not very old, it is not mystical. Additionally, I thickened the tree trunk to give it an aged appearance.
Two lines that curved upward toward one another were drawn by me. The trunk is based on these two lines.
I thought it would look nice and reduce static if I slanted the trunk little to the right.
That’s why I positioned it off-center as well.
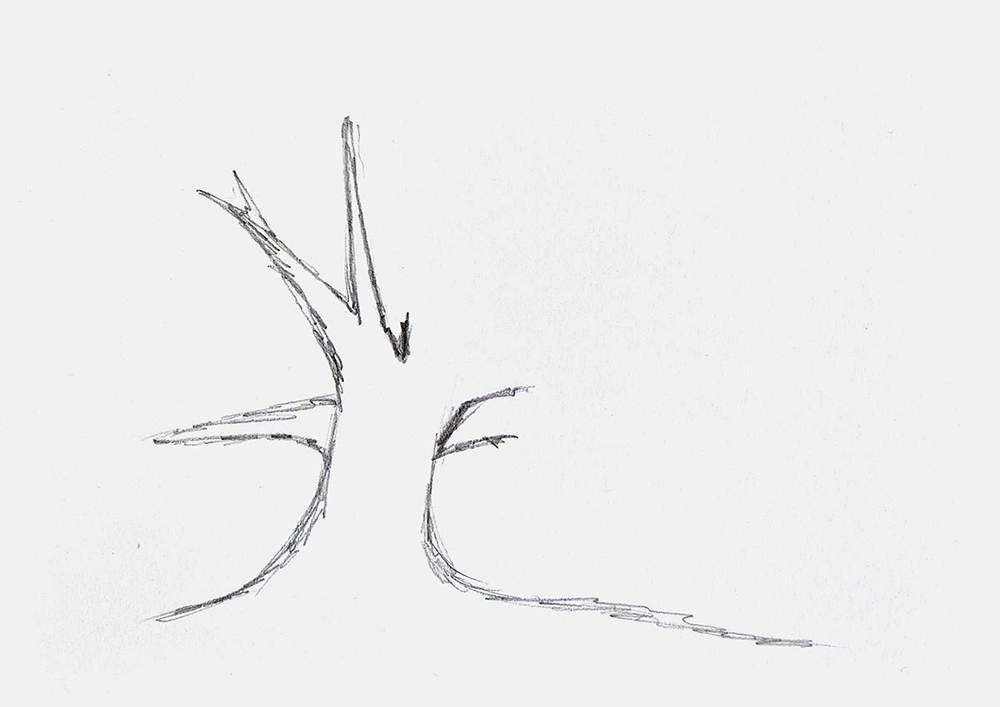
Step 2: Include a Few Large Branches
We may begin adding the branches now that the old tree trunk is in position.
I made the branches thick like the trunk.
I started by adding the tree’s left-hand branches. It was kind of wherever it felt natural.
I then added the branches to the tree’s right side.
As long as you distribute the branches really evenly and make them all the same length, you can’t really mess them up.
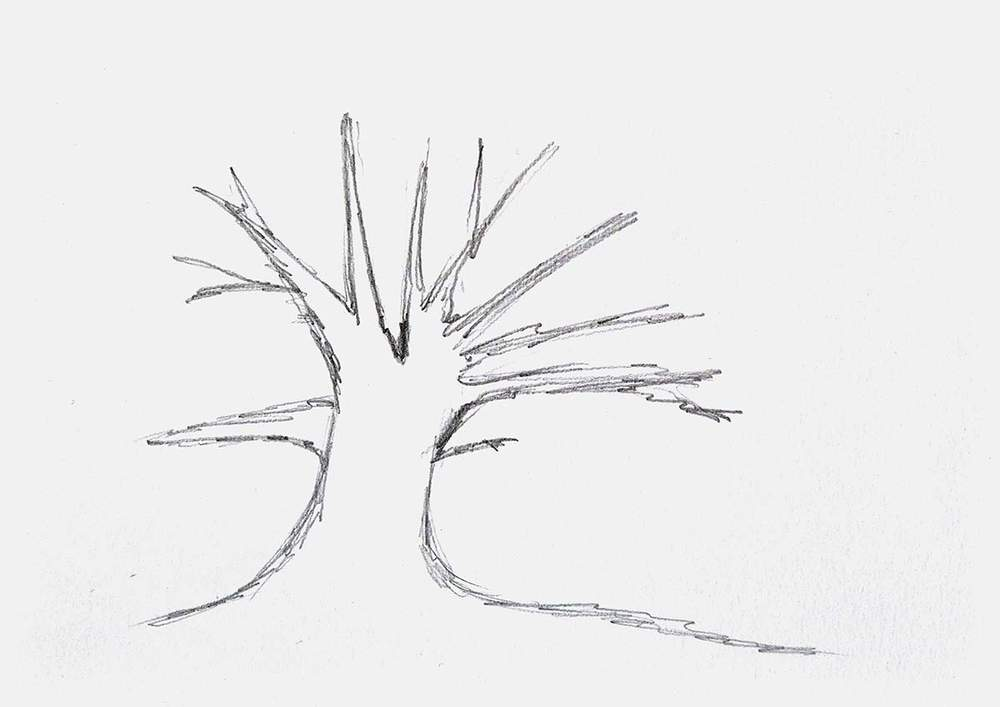
Step 3: Sketch Out the Leaf Shape
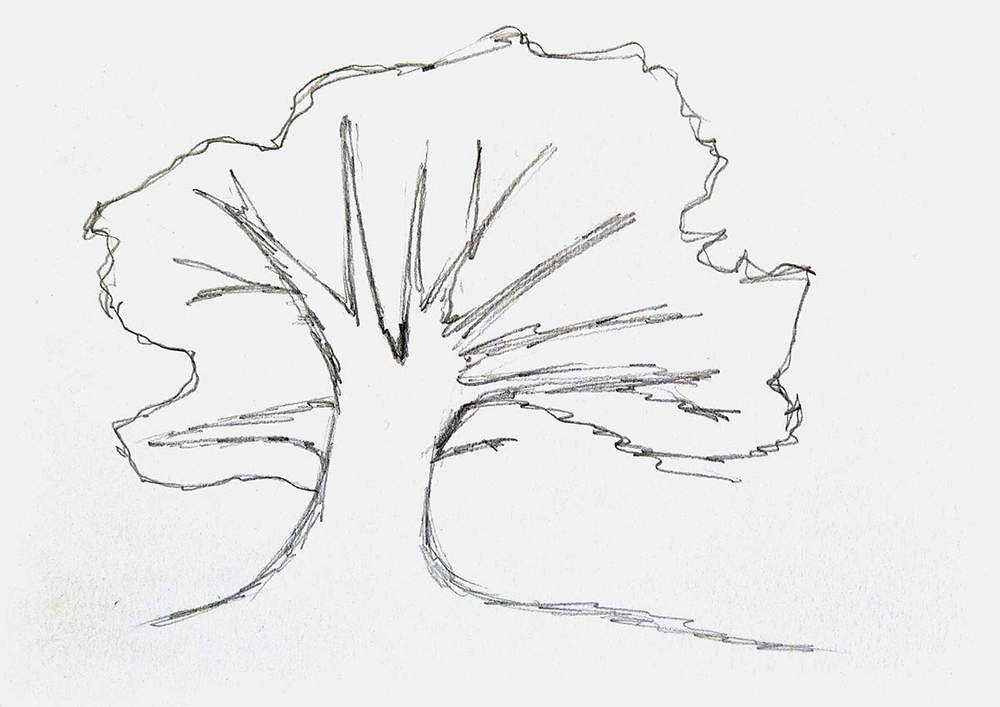
I drew the branches first, then added the leaf outline.
I took some extra padding and followed the branches roughly. In order to make the line appear more like leaves rather than perfectly smooth, I also made it scribbled.
Additionally, I made the decision to leave the single, tiny branch on the bottom right bare.
Step 4: Use a base of pastel colors that are somewhat purple to color the leaves.
Now that the drawing has been completed, it’s time to add color with markers!
To ensure that the sketch wouldn’t show through the marker ink, I first highlighted it with an eraser.
I then colored the leaves and certain areas of the ground using the three pastel shades of pink and purple.
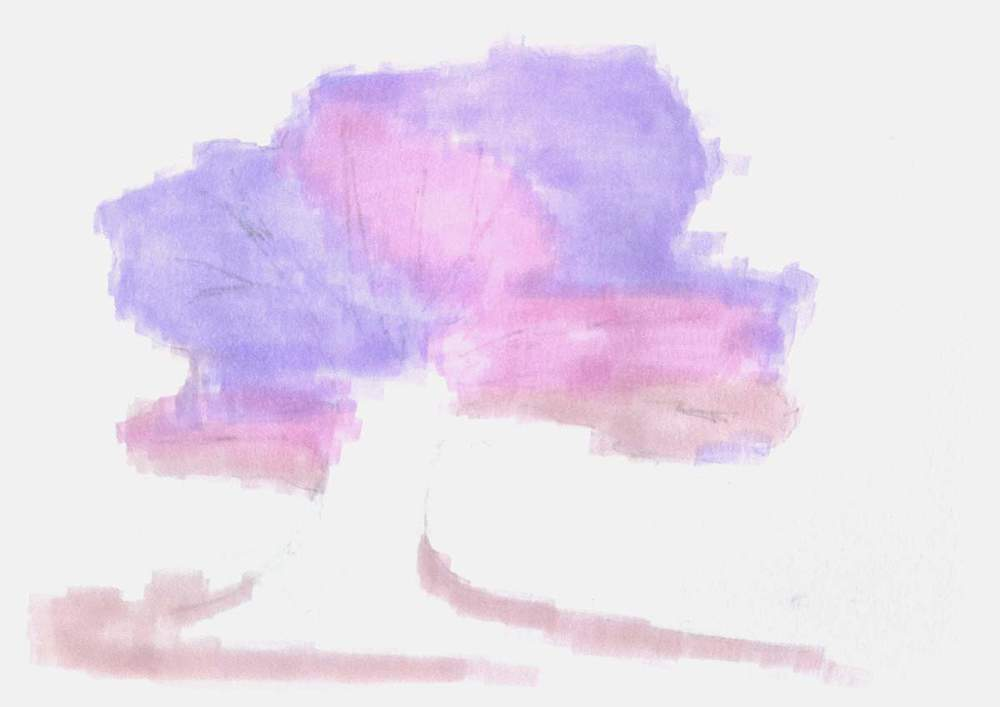
For the purple portions of the tree’s upper right and left leaves, I used Viola (V230).
For the more pinkish purple areas in the middle, bottom right, and bottom left, I used Pale Lilac (V020).
Additionally, I filed a lawsuit against Grayish Cherry (R242) for the ground, bottom left, and bottom right pastel pink.
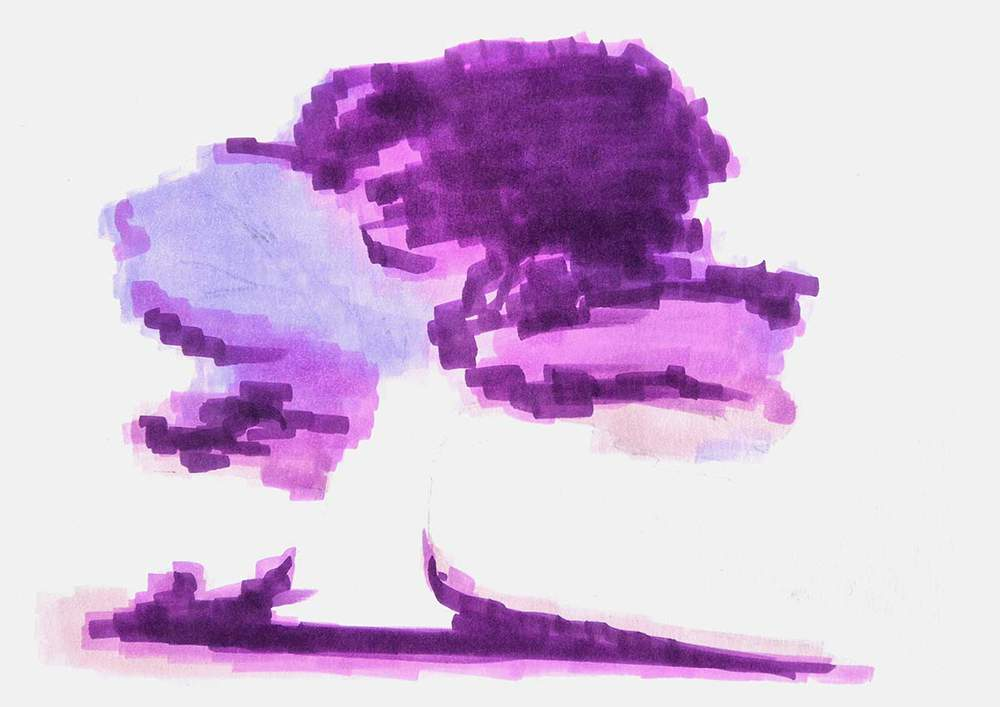
Step 5: Layer Darker Purples to Give the Leaves Dimension
I added extra purples to the first base layer of markers to give the leaves more depth.
I darkened the top, right, and bottom left of the leaves and added more color to the ground with Pastel Violet (P3).
I then applied extra shading to the tree’s upper right and a small amount to its lower left and right using Lavender (P4). To add some texture to the tree, I made these markings more scribble-like.
I added some color to the ground as well.
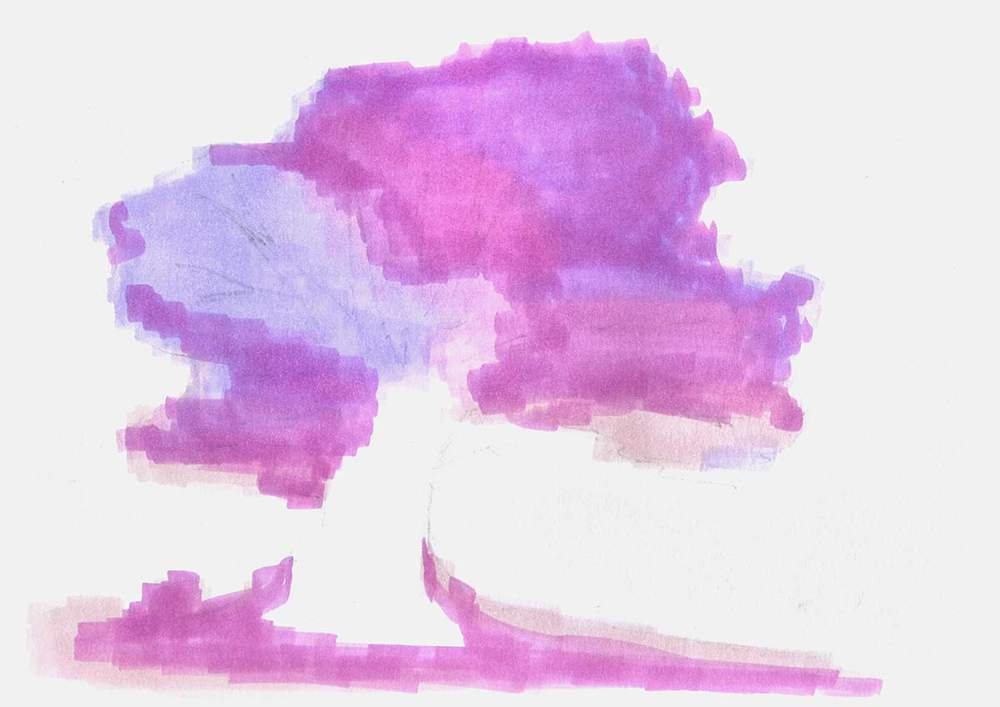
Finally, I shaded more of the ground below and around the trunk and added a few shadows to the top right and bottom left of the canopy using Pansy (R17).
Additionally, I used Clematis (R13) to give some blue-purple to the lower left.
Step 6: Paint the Magical Tree’s Trunk and Branches
I then painted the tree’s branches and ancient trunk.
I started by covering the stem and branches with a base layer of Red Grey 05 (RG050).
After that, I shaded and textured the trunk and branches using Red Grey 08 (RG080). To do this, I once more employed a lot of scribbled lines.
Finally, I added some extremely dark shadows to the base and the right side of the trunk using Neutral Grey 6 (NG06).
Additionally, I gave the branches on the right half of the tree dark shadows on the bottom and right sides.
Step 7: Surround the Tree with Some Magical Particles
The tree currently appears somewhat flat and uninteresting.
I surrounded our magical tree with particles to make it less dull.
I added additional dots to the ground and canopy using Pansy (R17), Lavender (P4), and Pastel Violet (P3).
This drawing already looks so much better with this minor adjustment.
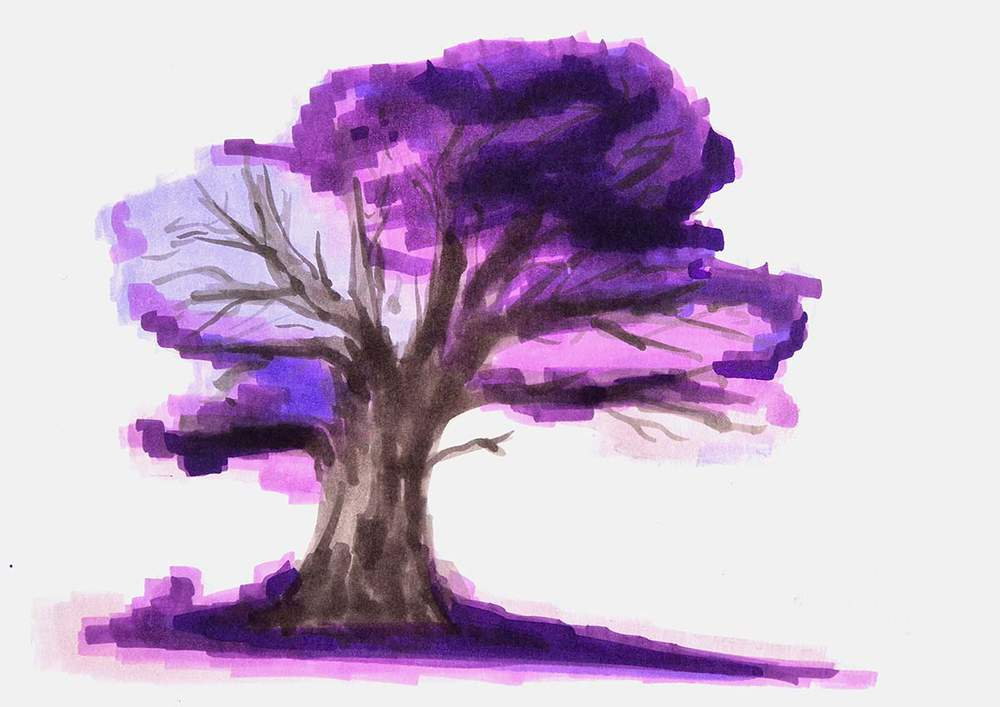
Step 8: Complete Your Enchanted Tree Drawing by Including a Few Highlights and Details
I choose to add some white accents to this drawing to make it slightly better and more engaging.
I added some scribbled lines where I felt they would look well with my white Posca paint marker. Using my white Derwent Chromaflow colored pencil, I followed suit.
In particular, I added some scribbled lines to the mystical tree’s trunk.
Once more, these lines add texture to the drawing of the mystical tree.
That completes the sketch of the enchanted tree!
I hope this tutorial was enjoyable to you!
Additionally, if your drawing didn’t seem as fantastic as you had hoped, keep in mind that practice makes perfect. I made several attempts until I finally arrived at this drawing.
Check out my other detailed drawing tutorials if you’d want to learn how to draw various subjects, such as flowers, a sunset, or anime characters.