Over the past few years, I have created a number of realistic car sketching guidelines that people find to be very beneficial.
I’ll demonstrate how to draw a realistic lowrider automobile in this automotive sketching lesson.
I go over each stage in great detail, and there are plenty of illustrations to help you follow along and make your own lowrider drawing.
Additionally, all you need to make this drawing are a few art tools.
Let’s begin! Step by Step
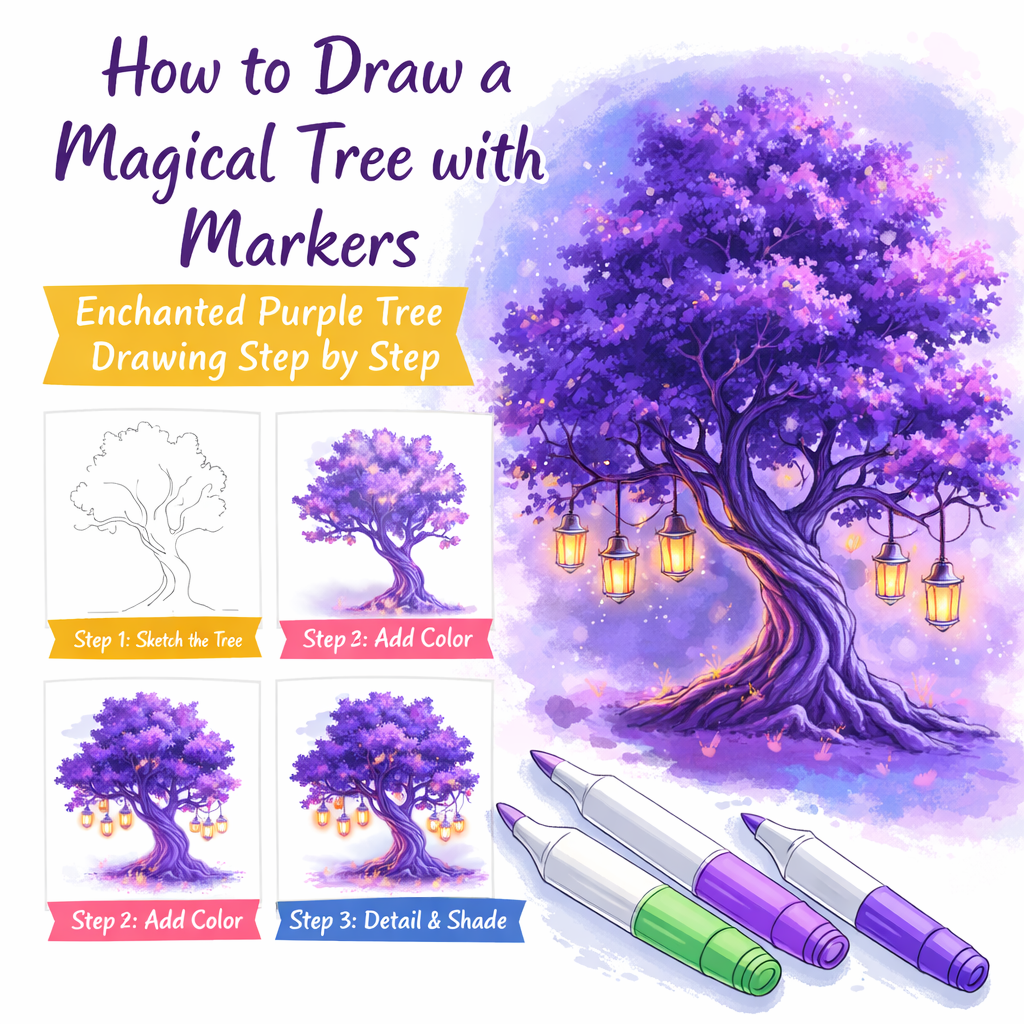
How to Draw a Magical Tree with Markers – Enchanted Purple Tree Drawing Step by Step : Click here
Disclaimer: For complete openness, please be advised that this blog post includes affiliate links. If you make a purchase via one of these links, I will receive a tiny compensation (at no additional cost to you).
Tools I Used for Drawing Step by Step
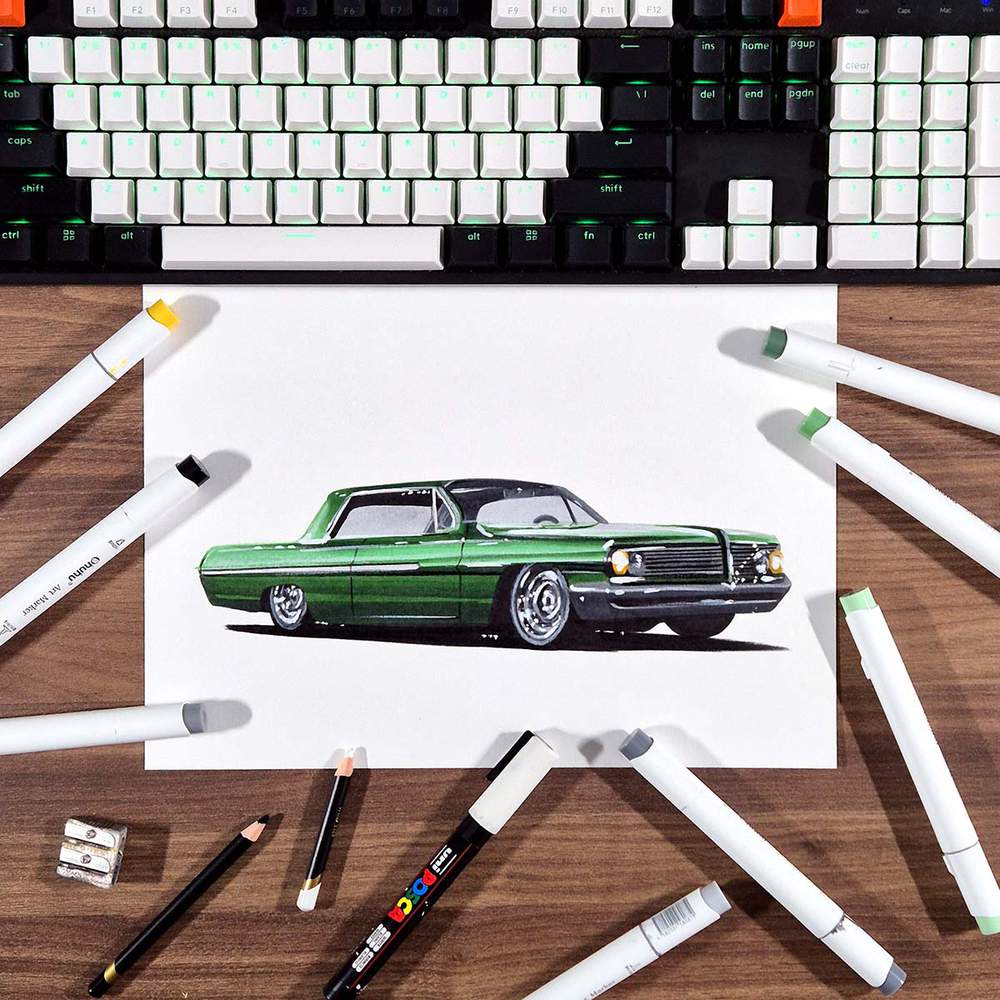
I used Ohuhu Honolulu markers in the following colors to create this drawing: Black (120), Sunflower (Y2), Leaf Green (G440), Pine Tree Green (G470), Chromium Oxide Green (G7), Neutral Grey 03 (CG030), Neutral Grey 3 (NG03), Neutral Grey 07 (CG070), and Neutral Grey 6 (NG06).
On their website, these hues are also available for individual purchase.
Without worrying about the specifics just yet, you then color your lowrider piece by piece from light to dark.
Lastly, you use a white paint marker to add some white highlights and a black and white colored pencil to add details.
Step 1: Locate a Lowrider Reference Photo
You must first locate a reference image of a lowrider car that you like in order to sketch it realistically.
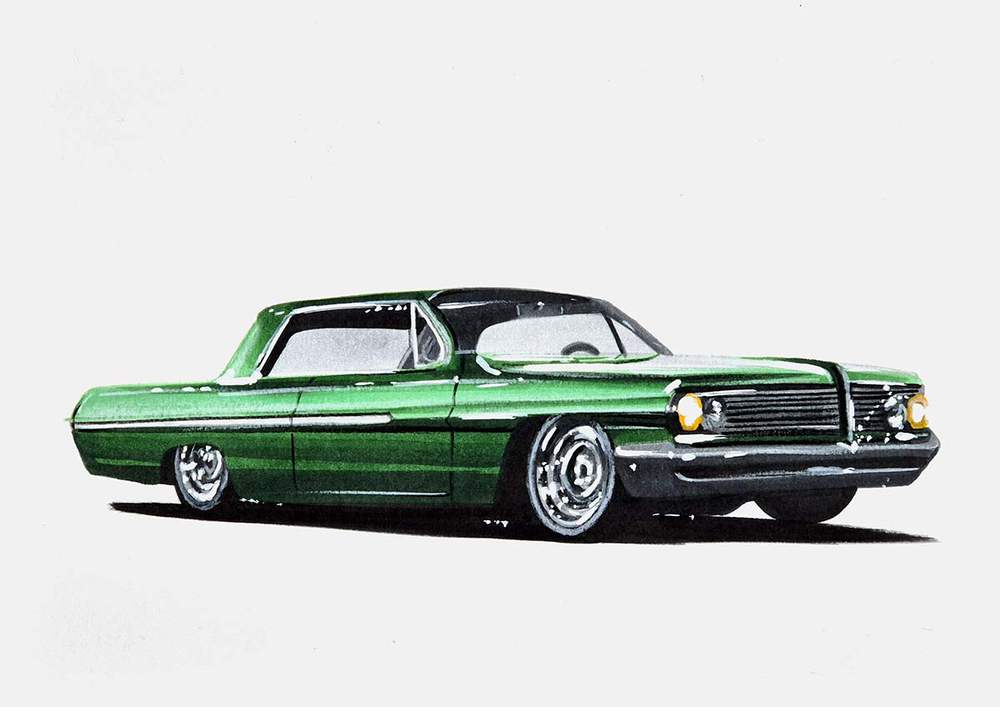
I enjoy browsing Unsplash, and I came across this picture of a green lowrider there that I will be utilizing as a guide for this vehicle sketching lesson.
If you’d like, you can use a different image. The procedures will be similar in general.
Step 2: Sketch the grid on your paper and apply a grid overlay to the reference image.
We can now begin drawing the car since we have located the reference image that will be used.
I prefer to utilize the grid method to make sketching the lowrider a little bit simpler.
This technique speeds up the process a little and makes sketching precise proportions much simpler.
I strongly advise you to read this guide I created on the grid approach if you’re unsure of what it is or how to use it.
We must first overlay our reference photo with a grid in order to apply the grid approach. Although it may seem challenging, adding the image to my grid overlay tool makes it simple.
Since this is the paper size I’m using, I set the width and height to 297 and 210 mm, respectively. You can adjust it to your own size if your paper is different.
The number of vertical squares is then automatically set to 10.6 when I set the number of horizontal squares to 15. Each square will measure 19.8 by 19.8 mm, but since it’s much simpler to sketch, I prefer to round it to 20 mm or 2 cm (about 4/5 inch).
Once more, you can add extra squares if you’d like. This will facilitate more accurate sketching.
I then repositioned the lowrider to the grid’s center.
I prefer to use a different hue to indicate the squares that hold the car’s components in order to make sketching it a little simpler. (My grid tool does not yet allow you to accomplish this. I completed it using Photoshop.)
We may now duplicate the grid on our paper as we have added it to the reference image.
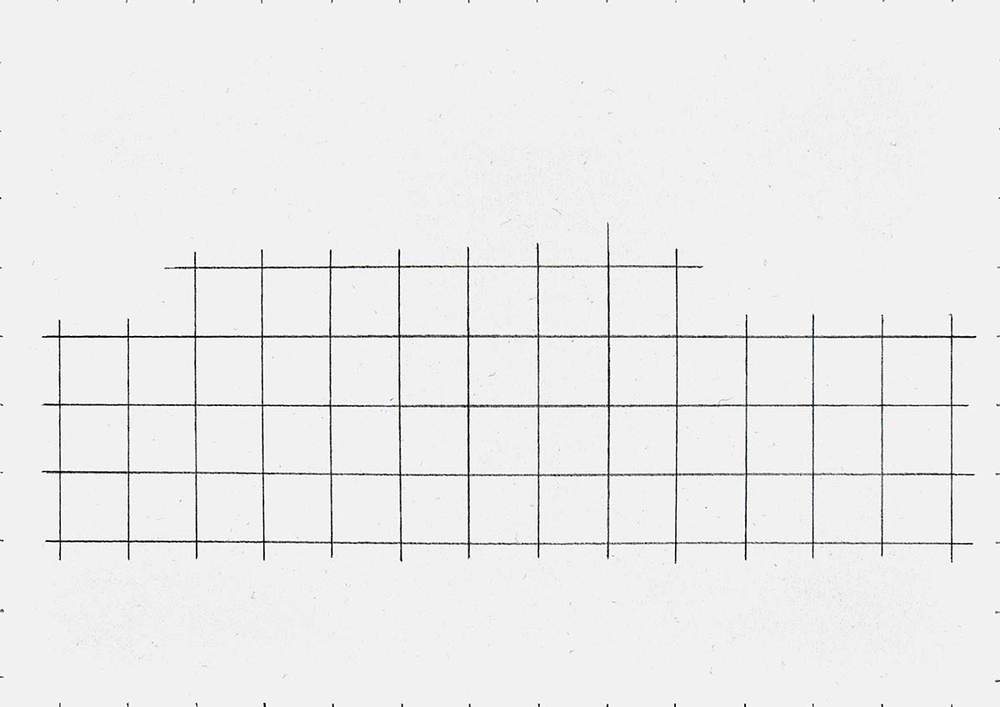
I begin by marking the paper’s margins every two centimeters, taking care to note that the squares on the right border are just under two centimeters since I rounded them up, and that the squares on the bottom edge are only roughly one centimeter high.
I then make the grid again. I like to draw just the squares with the previously marked car parts.
After I completed drawing the grid, it appeared as follows:
Step 3: Draw the Lowrider Car’s Outline
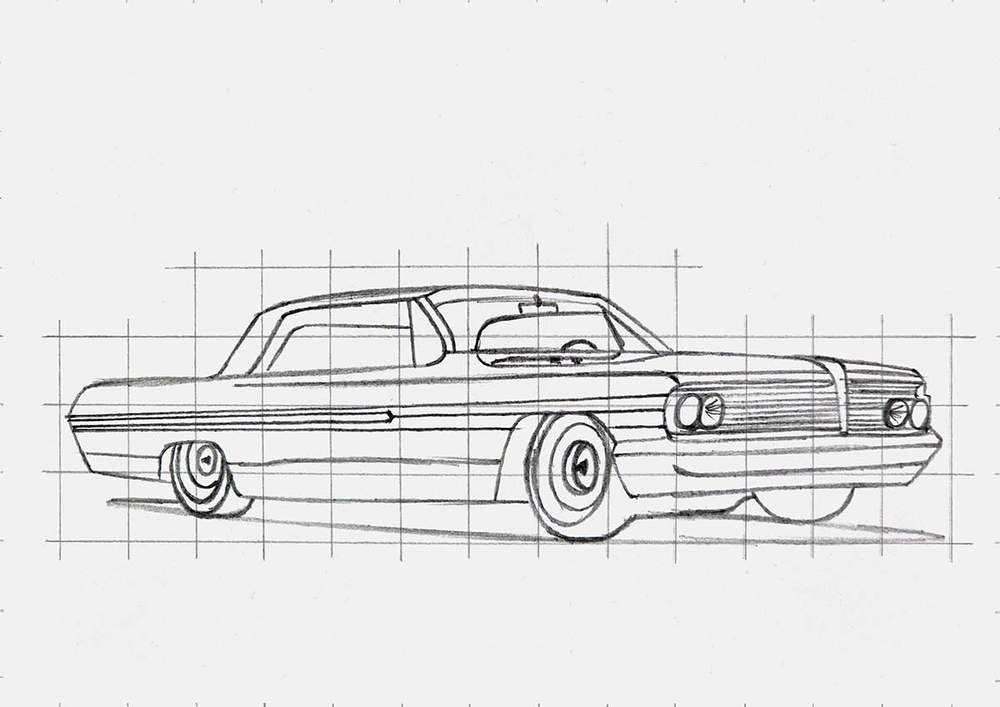
Now that the grid has been created, we can begin drawing the lowrider’s outline.
Since it serves as the foundation for the drawing, I prefer to begin with the car’s outline. This must contain all of the other sketches we will do.
I divided the outline into three sections: the wheels, the roof line, and the main body.
I began by drawing the main body. This is made up of some more intricate curved lines and a few long, straight lines.
I began by drawing the lengthy, large lines at the top.
I began by marking the beginning, ending, and crossing points of those lines using the grid lines. I then drew the lines in long motion.
I then concentrated on the remainder of the outline. After marking the beginning and finishing locations as well as the points where they intersected grid lines once more, I drew each line individually until the main body outline was complete.
In addition to the wheels and some of the components between the front wheels, I then added the window and roof line to the main body.
I sketched them after marking the beginning and finishing places, where the lines intersect grid lines, using the same method as before.
Making ensuring that everything is sketched in the correct square is crucial for the outline. If your sketch appears erratic, it’s most likely the result of either drawing a wheel in the incorrect square or a line that is either too long or too short.
I still frequently experience this, therefore before moving on to the next phase, I make careful to correct these errors.
Step 4: Complete the Lowrider with the Parts and Details
Once the lowrider’s outline is complete, adding the windows, chrome accents, grill, and other components is much simpler.
I employed the same method once more to sketch these sections.
I started by drawing the pieces’ outline. In addition to adding the chrome strip and the car’s side lines, I also sketched the shapes of the windows and the grills and headlights.
I then filled in those sections with all the details.
I added the steering wheel, the rearview mirror, the inside, and the side and rear window margins. I also added some features to the headlights in the center and the lines in the grill. Additionally, I drew the outline of the shadow beneath the automobile and added a slightly shaky line toward the bottom edge.
Step 5: Draw the Lowrider’s Wheels
As you may have observed, I haven’t yet sketched the wheels. This is because they are frequently the most difficult for people to sketch, so I try to focus a little more on them in my instructions.
But in contrast to all the other chrome lowrider wheels I’ve made for my site, they are quite basic.
These wheels are merely a series of ovals with a sharp object in the middle. That’s all.
I began by putting this pointed object to the wheel’s center because we had already drawn the wheel’s shape. Isn’t it little more to the right? It’s inserted into the wheel, which explains why.
In order to give the tire thickness, I also added the outer rim edge.
I then encircled the center point with a little ellipse.
I then encircled it with a larger oval. Once more, see how it passes behind the tire’s edge.
I put a second tiny ellipse to the middle of the front wheel. Once more, you can only see the left border of this ellipse because it is little more inset into the wheel.
And that completes the wheels. Quite simple, isn’t it?
Step 6: Draw the Lowrider Car’s Reflections
I prefer to draw the locations of the car’s reflections to finish the sketch. But the majority of the reflections match the previously drawn body lines.
All that remains are the windshield reflections on the hood directly beneath the front windshield.
I sketched up their form. They don’t have to be flawless. A bit additional distortion won’t hurt because they are already heavily distorted.
Step 7: Paint the Lowrider’s Pure Black Components
The lowrider drawing can now be colored because the sketch is complete.
I prefer to color the sections that are completely black first. This, in my opinion, makes the drawing appear simpler and less overwhelming while also making it easier to estimate the values of all other colors.
I simply used my Black (120) Ohuhu Honolulu marker to accomplish this.
Step 8: Apply paint to the Lowrider’s chrome wheels.
I then used markers to color the wheels and softened the sketch so it wouldn’t show through the ink.
I greatly simplified the wheels for this coloring step.
I began by using Neutral Grey 3 (NG03) to color both wheels.
I then used Neutral Grey 07 (CG070) to add dark reflections and shadowing. I took care to adhere to the wheels’ rounded contours in order to do this.
In order to identify the darker areas of the wheels and color them while keeping the lighter portions uncolored, I also glanced at the reference.
Finally, for the extremely dark grey sections of the wheels, I applied Neutral Grey 6 (NG06).
After looking over the reference once more, I noted the darkest areas on the drawing.
For the time being, the wheels are all colored.
Step 9: Apply paint to the Chrome strip on the Lowrider’s side.
I then used Neutral Grey 03 (CG030) to color the chrome strip on the lowrider’s side.
Step 10: Apply paint to the Lowrider’s front bumper, headlights, and front grills.
I then worked on the car’s front end.
I used my eraser to lighten the car’s front drawing first, and then I colored the grill, lights, and front bumper.
I colored the outside lights with Sunflower (Y2) and the inner two lights, grills, and front bumper with Neutral Grey 3 (NG03).
That concludes this phase.
I then shaded the upper half of the inner two lights and the middle of both grills with Neutral Grey 07 (CG070).
Along with adding two thin reflections beneath the grills on the top edge of the bumper, I also colored the bottom three-quarters of the front bumper, leaving a thin line beneath the black opening.
I used Neutral Grey 6 (NG06) to add even more black shading to the upper portion of the inner lights to complete the front of the car. It is sufficient to have a few blob forms.
Step 11: Paint the Lowrider Car’s Windows and Interior
I then used an eraser to soften that portion of the sketch before coloring the lowrider’s windows and interior.
I began by coloring the triangular chrome frame directly behind the A-pillar, the side window visible through the windshield, and the rear window visible through the side window.
I then colored the steering wheel and the remainder of the interior using Neutral Grey 3 (NG03).
These sections were colored with Neutral Grey 03 (CG030).
I then used Neutral Grey 07 (CG070) to shade the steering wheel and other interior components. In order for you to see the rearview mirror now, I made care to leave it lighter. I also left two lighter lines on the right side of the rear glass.
Finally, I used Neutral Grey 6 (NG06) to add additional darker shade to the interior, mostly on the roof.
Additionally, I used Neutral Grey 07 (CG070) to darken the rearview mirror because I didn’t like how bright it looked.
That concludes the grey areas!
We can now proceed to my favorite aspect of drawing a car: adding color to the main body and reflections.
Step 12: Paint the Lowrider Car’s Main Body and Reflections
I’m drawing a lowrider using a reference photo that was taken at night. If I had drawn the background as well, this probably would have looked good, but that wasn’t my intention. I just intended to sketch the vehicle.
I modified the colors a little milder so the car will appear well on paper on a white background. Additionally, I simplified the colors in this design to make it easier for you to follow along.
To prevent the sketch from showing through the marker ink, I first highlighted it before beginning to color the body.
I started by applying a light gray coat to the hood in order to color the car’s primary body. To do this, I used Neutral Grey 03 (CG030).
Then, using Leaf Green (G440), the lightest of the three greens I’ll be using, I painted the top half of the automobile.
Additionally, I partially overlaid this on the hood’s reflections and front edge.
I then colored the lowrider’s lower half with Pine Tree Green (G470).
In keeping with the chrome strip on the side of the car, I also shaded the upper edge of the line. Additionally, I applied paint to the top border of the car’s side, the A-pillar, the roof, the green area surrounding the grills, and the hood line.
Additionally, I shaded the darker areas of the car’s body using Chromium Oxide Green (G7) to finish it off.
I put a thick black line over the car’s side and darkened the bottom edge.
Additionally, I darkened the bottom border of the body lines that extend from the side’s chrome strip to the car’s front end.
Additionally, I darkened the top edge of the car’s side, the roof, the A-pillar, the green underneath the grills, and the nose fin that is located on the hood and between the grills.
Although the lowrider is now completely colored, it is not yet complete.
Many elements, such as the grill lines and the wheel accents, are absent.
We’re going to add that next.
Step 13: Use colored pencils to add details on the lowrider
This drawing looks so much better with only a black and white colored pencil.
However, I initially deleted the remaining portion of the sketch before proceeding. Erasing it now is simpler than removing colored pencil elements you need to avoid later.
It’s time to finish this lowrider drawing by adding all the details.
I did this with the black pencil:
Include the holes in the doors.
Above the chrome strip on the car’s side, add a black line.
Attach the grills’ horizontal lines.
Add a few elliptical, black lines to the wheels.
I then did the following with the white pencil:
To make the wheels appear much more chrome-like, add accents.
Emphasize the upper portion of the side chrome strip.
Install the window sills in chrome.
Emphasize the front chrome bumper’s edges.
Make the headlights have highlight dots.
Put some highlighted lines on the vehicle’s side.
Draw attention to a few edges on the rearview mirror.
Step 14: Add Highlights to the Lowrider’s Body and Chrome
I also used my paint marker to add a few white accents to complete the lowrider drawing.
I kind of went overboard with the highlights because this lowrider has a lot of chrome components.
I added numerous highlights to the car’s wheels, front end, headlights, window sills, upper portion of the main body side, windshield, and even the bottom edge.
This, in my opinion, added a lot more life to the lowrider drawing than the pencil details alone.
That’s it! I created this drawing in this manner, and you can do the same with your own lowrider.
Don’t give up if drawing this feels difficult. Most individuals give up and stop at this point. However, you are aware of that.
I hope this was useful to you.
Check out my other automobile sketching guides if you did. I’m grateful.