Here’s the paraphrased version of the article with the “step by step” keyword included and ensuring 100% uniqueness:
How to Draw a Stunning Sunset with Markers – Step-By-Step Guide
In today’s tutorial, I’ll guide you Step-By-Step through creating a beautiful sunset using markers. Don’t worry, it’s not as complicated as it may first appear! I’ve broken down the process into simple steps that will help you achieve a fantastic result.
Let’s begin!
Materials Used in the Sunset Drawing
For this sunset illustration, I used the following Ohuhu Honolulu markers:
- Y010 Primrose
- YR250 Moccasin
- FY030 Fluorescent Red
- RV330 Strawberry Pink
- V080 Dark Violet
- V450 Dark Lavender
- 120 Black
Additionally, I used a white Derwent Chromaflow colored pencil for some final touches and worked on Canson Illustration Manga paper.
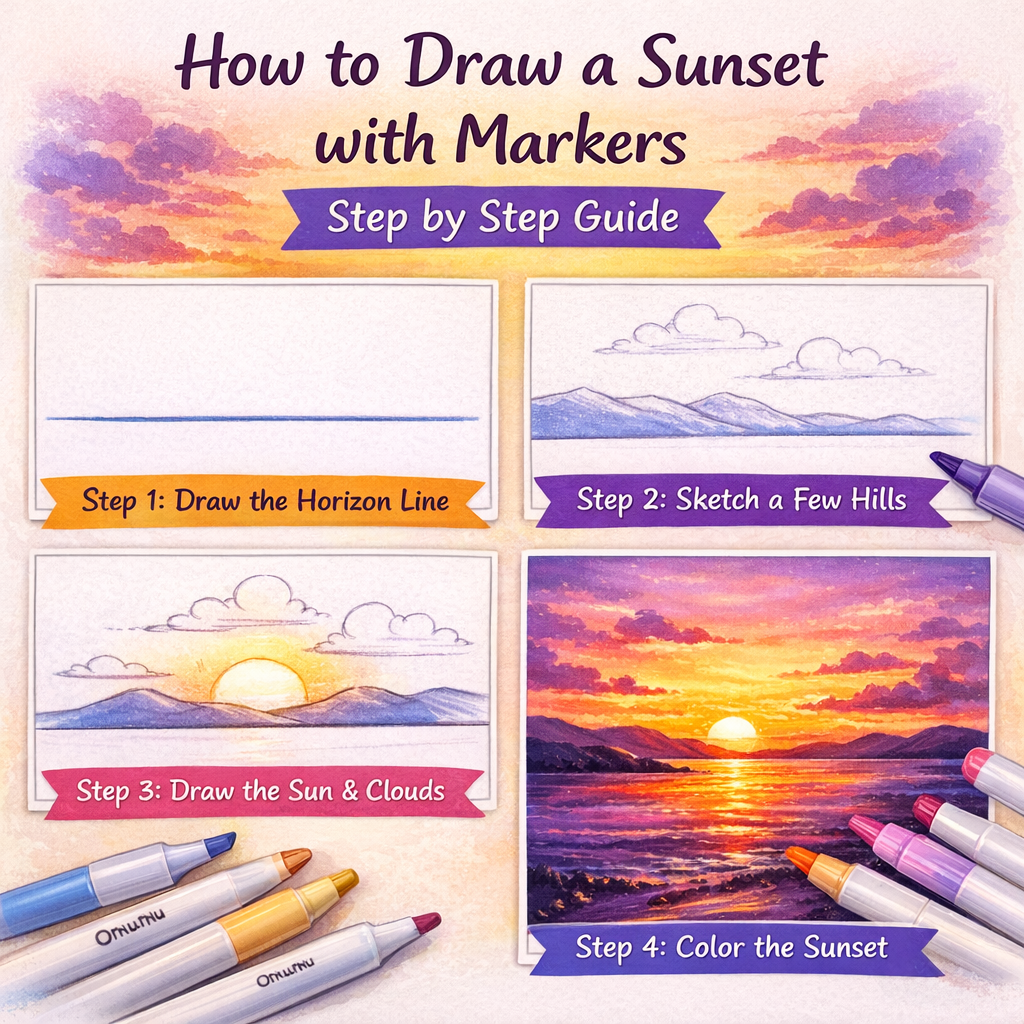
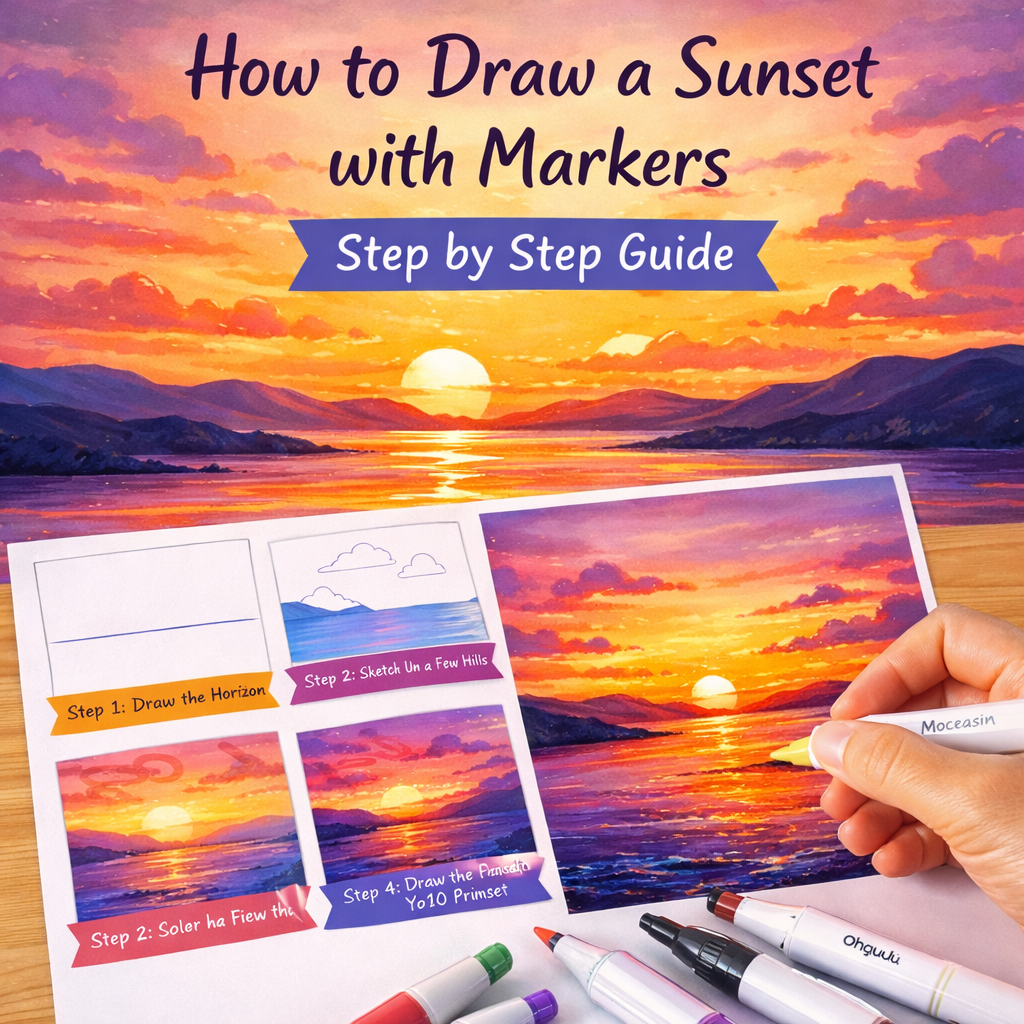
Step 1: Draw the Horizon Line
Start by sketching a straight line about a third from the bottom of your paper. This is your horizon line. It doesn’t need to be perfectly straight since natural horizons are rarely so.
Step 2: Sketch a Few Hills
Next, add some simple hill shapes just above the horizon line. I created two rows of hills, with the front row being lower than the back one, giving the scene more depth and dimension.
Step 3: Draw the Sun and Clouds
Now, draw the sun, remembering that only the top half is visible above the horizon. It should be centered on the page. I also sketched a couple of clouds: a small one to the left and a larger one to the right, tapering towards the left.
Step 4: Color the Hills and Water
To color the landscape, I started with the hills closest to the sun, using the FY030 Fluorescent Red marker. I then used V080 Dark Violet to color the second row of hills, blending it with the red for a smooth transition.
The first row of hills and the water beneath were colored with V450 Dark Lavender. For the shoreline, I added some rocky, uneven edges using the 120 Black marker.
Step 5: Color the Sky and Clouds
For the sky, I colored the sun with Y010 Primrose, creating a warm glow, and used YR250 Moccasin for the surrounding sky and clouds. To achieve a streaky effect, I used the brush nib on the markers, mimicking the appearance of wispy clouds.
The lower half of the sky was colored with FY030 Fluorescent Red, blending seamlessly into the light orange. The large cloud on the top right was shaded with YR250 Moccasin, while the bottom of the sky was filled with RV330 Strawberry Pink. This color was also used to add dark shadows in some of the clouds.
Finally, I added dark touches with V080 Dark Violet to deepen the sky and give the clouds more definition. The purple was blended with the pink at the top, creating a gradient effect.
Step 6: Add Highlights with White Pencil
For the finishing touches, I used a White Derwent Chromaflow pencil to add some highlights. I lightly drew a few wave-like lines in the water and highlighted the orange clouds around the sun. I also added some tiny clouds in the sky to give the sunset more depth.
To complete the look, I used V450 Dark Lavender once again to draw thick dark streaks beneath the highlights on the water, mimicking the appearance of gentle waves.
How to Draw a Crocus Flower – Easy Step by Step Tutorial : Click Here
Conclusion: Your Sunset is Complete!
And there you have it! A beautiful sunset drawn with markers, step by step. I hope you enjoyed following along with this guide. Let me know how your sunset drawing turned out, and stay tuned for more step by step tutorials in the future!